When water begins to escape from the edge of your shower door, the issue often traces back to a worn or poorly fitted seal. In this Vertical Shower Door Seal Strip: Size, Fit & Replacement Guide, we explain how to measure, choose, and replace the right seal so your bathroom stays dry and protected. A properly installed vertical shower door seal strip prevents leaks, reduces mold growth, and protects flooring and walls from costly damage. With the right size and fit, you can restore a tight seal and extend the life of your shower enclosure.
Why a Vertical Shower Door Seal Strip Matters
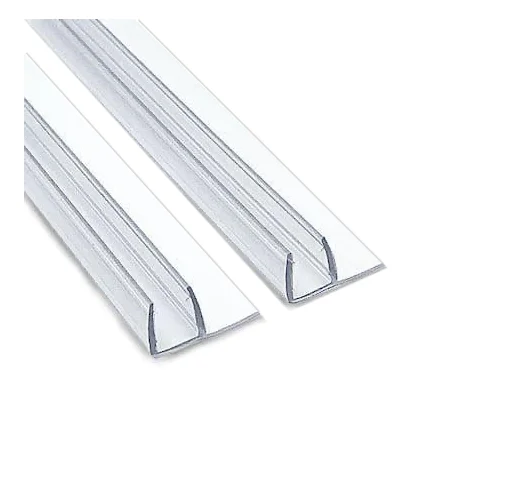
A vertical shower door seal strip runs along the upright edge of a glass shower door. Its main job is simple but critical: it blocks water from escaping between the door and the fixed panel or wall. Without a snug seal, water seeps onto tile, grout lines, and even subflooring.
We often see homeowners focus on hinges, rollers, or handles while ignoring the condition of the seal. Over time, constant exposure to moisture, soap residue, and cleaning chemicals causes vinyl or PVC seals to harden, shrink, or crack. Once that flexibility is gone, gaps form. Even a small gap can lead to puddles outside the shower after every use.
Replacing a vertical shower door seal strip is one of the most affordable maintenance steps you can take. It protects:
- Bathroom flooring from water damage
- Cabinet bases and trim near the shower
- Grout lines from constant moisture exposure
- Indoor air quality by limiting mold growth
Types of Vertical Shower Door Seal Strips
Not all seals are the same. The right choice depends on your shower door style, glass thickness, and how the door closes.
Clear Vinyl Seal Strips
Clear vinyl is the most common material. It blends with glass and offers flexibility for a tight seal. These strips usually slide onto the glass edge without adhesive. They are ideal for frameless shower doors.
Magnetic Vertical Seals
Magnetic vertical shower door seal strip options are used when two glass panels meet in the center. Embedded magnets pull the doors together to prevent leaks. Proper alignment is essential for these to work correctly.
Fin or Sweep-Style Vertical Seals
Some vertical strips include a soft fin that compresses when the door closes against a wall or fixed panel. This style helps fill small gaps caused by minor misalignment.
How to Measure for the Correct Size
Choosing the right size is the most important step in this Vertical Shower Door Seal Strip: Size, Fit & Replacement Guide. An incorrect measurement leads to loose fit, difficulty closing the door, or continued leaks.
Step 1: Measure Glass Thickness
Use a caliper or tape measure to determine the thickness of the glass. Common sizes include:
- 1/4 inch
- 3/8 inch
- 1/2 inch
The vertical shower door seal strip must match the glass thickness exactly. A 3/8 inch seal will not grip properly on 1/4 inch glass.
Step 2: Measure the Height
Measure the full vertical length of the glass edge where the seal will sit. Most seals can be trimmed with scissors or a utility knife for a custom fit. Measure twice to avoid cutting too short.
Step 3: Check the Gap Width
Close the shower door and measure the space between the door and the wall or adjacent panel. This gap determines whether you need a standard compression seal or a wider fin-style seal.
Signs It Is Time to Replace Your Vertical Shower Door Seal Strip
Many homeowners delay replacement because the seal still looks intact from a distance. However, close inspection often reveals problems.
Watch for these warning signs:
- Visible cracks or yellowing along the strip
- Seal pulling away from the glass edge
- Water pooling outside the shower
- Door no longer closing tightly
- Mold buildup trapped under the seal
If you notice any of these issues, replacing the vertical shower door seal strip can prevent more serious water damage.
Step-by-Step Replacement Process
Replacing a vertical shower door seal strip does not require advanced tools. With patience and careful measurement, most homeowners can complete the job in under an hour.
1. Remove the Old Seal
Gently pull the existing strip downward from the glass edge. If mineral buildup makes removal difficult, apply a small amount of warm water and mild soap to loosen residue.
2. Clean the Glass Edge
Use a non-abrasive cleaner to remove soap scum and mineral deposits. Run your fingers along the edge to ensure it feels smooth. Any debris left behind can prevent a proper fit.
3. Cut the New Seal to Length
Align the new vertical shower door seal strip against the glass and mark the correct height. Trim carefully with sharp scissors or a utility blade.
4. Install the New Seal
Starting at the top, press the seal firmly onto the glass edge. Slide it downward evenly. Make sure it sits flush and does not twist. Close the door slowly to confirm proper alignment.
Common Fit Problems and How to Fix Them
Even with accurate measurements, installation errors can affect performance.
Seal Feels Too Tight
If the door resists closing, confirm that the glass thickness matches the seal specification. A tight seal can stress hinges over time.
Seal Slips Off
This usually indicates the seal channel is too wide for the glass. Replace it with the correct size rather than using adhesive, which complicates future removal.
Water Still Leaks
Check door alignment. Sometimes the issue is hinge adjustment rather than the vertical shower door seal strip itself.
Material Comparison Table
| Material | Durability | Flexibility | Best For |
|---|---|---|---|
| Clear PVC | Moderate | High | Frameless doors |
| Magnetic Strip | High | Moderate | Glass-to-glass closure |
| Polycarbonate | High | Lower | Heavy-use showers |
Maintenance Tips for Long-Term Performance
Regular care extends the life of your vertical shower door seal strip. After each shower, wipe down the glass and seal with a soft cloth. This simple habit reduces mineral buildup and keeps the strip flexible.
Avoid harsh chemical cleaners that dry out vinyl. Mild soap and warm water are enough for routine cleaning. Inspect the seal every few months for stiffness or discoloration.
We have found that homeowners who maintain their seals consistently often double the lifespan of the strip. A few minutes of care can prevent early replacement.
Choosing the Right Replacement Supplier
When buying a vertical shower door seal strip, review product specifications carefully. Confirm:
- Exact glass thickness compatibility
- Seal profile shape
- Length provided
- Return policy in case of incorrect fit
Reading verified customer reviews can also provide insight into real-world performance. Look for feedback about ease of installation and durability.
Cost Expectations
A standard vertical shower door seal strip typically ranges from $15 to $40 depending on material and length. Magnetic versions may cost more. Compared to repairing water-damaged flooring, this is a small investment.
Professional installation is rarely necessary, but if hired, labor costs may range from $75 to $150 depending on your area.
Frequently Asked Questions
Can I reuse an old vertical shower door seal strip?
Reusing an old seal is not recommended. Once removed, the channel often loses its grip and may not reseat properly.
How long does a vertical seal typically last?
Most vinyl seals last 2 to 5 years depending on water hardness, usage frequency, and cleaning habits.
Do frameless shower doors require special seals?
Yes. Frameless designs rely heavily on precisely fitted vertical shower door seal strip components to maintain a watertight barrier.
Final Thoughts on Vertical Shower Door Seal Strip: Size, Fit & Replacement Guide
This Vertical Shower Door Seal Strip: Size, Fit & Replacement Guide highlights how correct sizing, proper installation, and routine maintenance protect your bathroom from water damage. A well-fitted vertical shower door seal strip keeps water inside the shower where it belongs. By measuring glass thickness carefully, selecting the correct profile, and installing it with attention to detail, you ensure long-lasting performance.
If your current seal shows wear or allows leaks, replacing it promptly is one of the most practical upgrades you can make. With accurate measurements and the right materials, you can restore a clean, tight seal and maintain a dry, safe bathroom environment for years to come.